To create an account, you will need an email address, the business name and country of incorporation, as well as a way to create a passkey using a compatible device.
Sandbox developer accounts are usually approved in less than one business day and take under an hour to create and onboard.
➊ Sign Up in Sandbox
Before you begin, ensure you are able to create and store a passkey on your device.
All modern operating systems and browsers support passkeys.
- Go to https://dashboard.sandbox.paxos.com, select Sign Up, and provide a name and email address to create an Institutional (Business) account. Individual account holders are not eligible for API access via the Dashboard.
- Retrieve the verification code from the welcome email from Paxos and enter the code in the browser. If you don’t get an email within a few minutes, check email filters and Spam/Junk folders for an email from
@paxos.com. Contact Support if the email never arrives.
- Create a passkey.
➋ Onboard Developer Account
You have a choice:
- skip onboarding which takes you directly to an approved account, or
- experience the entire onboarding process, which you’d have to undergo in production
Skip Onboarding
If you choose to skip onboarding then exit out of the modal and click the “Skip Onboarding” button.
Then proceed to the ➍ Enable Developer Access instructions on this page.
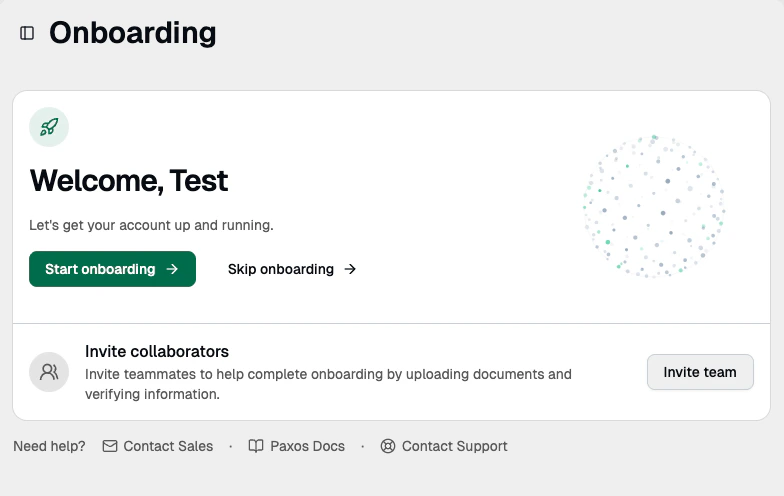
Experience the Onboarding Process
Otherwise, click the “Start Onboarding” button and complete the onboarding flow.
Use stubbed (fake) text when entering data.
The information provided will not be used when creating the production account.
- Provide basic business information and accept the Terms of Service
- Business Details. Selecting Corporation as the institution type provides the quickest experience. The country field is pre-populated with the information you provided when creating the account.
- Funding Details. Select No for the trust structure and nominee shareholder options.
- Some account types will require you to fill out the Suitability Assessment. If you are not presented with this option, go to the next step. If you see the assessment: Select Yes and Advanced for the first two options.
- Business Members. Open the edit dialog for the name you gave during account creation and provide the required fields. You can use fake (dummy) text.
- Beneficial Owner Designation. Ensure Yes is selected. Give information. The % of Ownership should be
100.
- For Authorized User Designation, Persons with Management Control Designation and Director Designation, select Yes.
- Accept the Pricing & Fees.
- Upload dummy documents to the Documents section.
- Submit for review.
Support must activate your Developer account before you can use it.
To ensure a smooth process, include your email address and business (organization) name when submitting a request.
You will receive an email from support confirming your Developer Sandbox account is good to go.
Occasionally, Support may reach out to you via email requesting additional information or if there is an issue creating the account.
➍ Enable Developer Access
Once the account is activated, you will have the Developer role. You can invite other users via the Team Management page and give them the Developer role too.
Once your user has the Developer role, you can create API credentials.
➎ Fund Sandbox Account
Use the Dashboard to add test funds to your Sandbox account. This allows you to simulate transactions with any supported asset type.
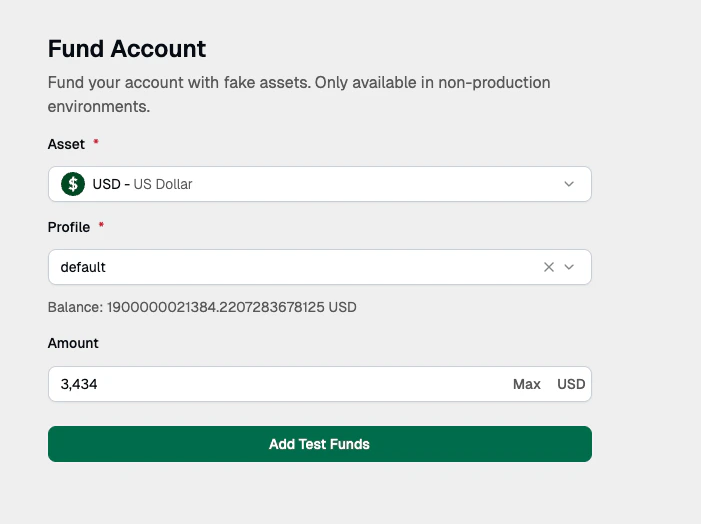
- Go to your Dashboard and select the Fund button.
- Choose the asset type and amount you want to add.
- Confirm the deposit.
Test funds are only available in Sandbox and have no real value. Use them to validate your integration before moving to Production.