This guide walks through setting up a Fiat and Crypto Subledger crypto brokerage integration for institutions,
creating an Institution Identity and a related Account and Profile to book orders using the Order API. First, we will
create an Identity to represent the institution’s KYC information on the Paxos Platform. Then we will create an Account which sets
up the structure of the brokerage account. Then we will create a Profile that represents the institution’s fiat and crypto asset holdings. Then we will integrate with the Order API to
set up a simple Buy, Hold and Sell integration. This guide should take around 30 minutes.
Prerequisites
Authenticate in Sandbox
Create an API Key on the Sandbox Paxos Dashboard with the following scopes to access the Identity,
Account and Order APIs needed for this guide
identity:read_identityidentity:read_accountidentity:write_identityidentity:write_accountfunding:read_profilefunding:write_profileexchange:read_orderexchange:write_order
Run below to get the access_token from OAuth:
curl --location 'https://oauth.sandbox.paxos.com/oauth2/token' \
--form grant_type=client_credentials \
--form client_id={paxos_client_id} \
--form client_secret={paxos_secret} \
--form scope='identity:read_identity identity:read_account identity:write_identity identity:write_account funding:read_profile funding:write_profile exchange:read_order exchange:write_order'
access_token to use in the request authorization header
throughout this guide.
{
 "access_token": "{access_token}",
 "expires_in": 3599,
 "scope": "identity:read_identity identity:read_account identity:write_identity identity:write_account funding:read_profile funding:write_profile exchange:read_order exchange:write_order",
 "token_type": "bearer"
}
Include the Authorization header with the bearer token on all API requests -H "Authorization: Bearer $TOKEN".
Creating an Institution Identity and Account
Institution identities are used to represent all non-person entities. Details for institution identity type are recorded in institution_details. An institution identity also has institution_members associated with it. This defines persons or other entities that have some relationship to the institution.
For detailed information about institution types, subtypes, and required fields, please refer to the Institution Required Details documentation.
➊ Creating Person Identities for Institution Members
Before creating an institution identity, you need to create person identities that will be associated with the institution as members (e.g.
beneficial owners, authorized users, management control persons, etc.).
You’ll need to create at least one person identity, but typically you’ll create multiple identities for different roles within the institution.
# Create a person identity
curl --location "https://api.sandbox.paxos.com/v2/identity/identities" \
--header "Authorization: Bearer {access_token}" \
--header "Content-Type: application/json" \
--data '{
  "ref_id": "{your_end_user_ref_id}",
  "person_details": {
    "verifier_type": "PASSTHROUGH",
    "passthrough_verifier_type": "JUMIO",
    "passthrough_verified_at": "2021-06-16T09:28:14Z",
    "passthrough_verification_id": "775300ef-4edb-47b9-8ec4-f45fe3cbf41f",
    "passthrough_verification_status": "APPROVED",
    "passthrough_verification_fields": ["FULL_LEGAL_NAME", "DATE_OF_BIRTH"],
    "first_name": "Billy",
    "last_name": "Duncan",
    "date_of_birth": "1980-01-01",
    "nationality": "USA",
    "address": {
      "address1": "123 Main St",
      "city": "New York",
      "province": "NY",
      "country": "USA",
      "zip_code": "10001"
    },
    "cip_id": "073-05-1127",
    "cip_id_type": "SSN",
    "cip_id_country": "USA",
    "phone_number": "+1 555 678 1234",
    "email": "example@somemail.org"
  },
  "customer_due_diligence": {
    "estimated_yearly_income": "INCOME_50K_TO_100K",
    "expected_transfer_value": "TRANSFER_VALUE_25K_TO_50K",
    "source_of_wealth": "EMPLOYMENT_INCOME",
    "employment_status": "FULL_TIME",
    "employment_industry_sector": "ARTS_ENTERTAINMENT_RECREATION"
  }
}'
identity_id of the newly created person identity. You’ll need this ID when creating the institution identity.
{
  "id": "{person_identity_id}",
  "status": "PENDING",
  "created_at": "2021-06-16T09:28:14Z",
  "updated_at": "2021-06-16T09:28:14Z",
  "ref_id": "{your_end_user_ref_id}",
  "person_details": {
    // ...
  }
}
➋ Creating an Institution Identity
To create an institution identity, you’ll need to provide:
Here’s an example of creating a institution (see API documentation for full request details):
# Example API call to create an institution identity
curl --location "https://api.sandbox.paxos.com/v2/identity/identities" \
--header "Authorization: Bearer {access_token}" \
--header "Content-Type: application/json" \
--data '{
  "institution_members": [
    {
      "identity_id": "{person_identity_id}",
      "roles": ["BENEFICIAL_OWNER", "AUTHORIZED_USER", "MANAGEMENT_CONTROL_PERSON"]
    }
  ],
  "institution_details": {
    "name": "Foogle",
    "business_address": {
      "country": "United States",
      "address1": "1 Example St",
      "city": "New York",
      "province": "NY",
      "zip_code": "10001"
    },
    "email": "johndoe@foogle.com",
    "institution_type": "CORPORATION",
    "institution_sub_type": "HEDGE_FUND",
    "cip_id": "12-3456789",
    "cip_id_type": "EIN",
    "cip_id_country": "USA",
    "govt_registration_date": "2021-04-14T00:00:00Z",
    "incorporation_address": {
      "country": "United States",
      "address1": "1 Example St",
      "city": "New York",
      "province": "NY",
      "zip_code": "10001"
    },
    "regulation_status": "US_REGULATED",
    "trading_type": "PUBLIC",
    "listed_exchange": "NASDAQ",
    "ticker_symbol": "FOOG",
    "regulator_name": "SEC",
    "regulator_jurisdiction": "USA",
    "regulator_register_number": "12-3456789",
    "business_description": "Foo"
  },
  "ref_id": "{your_inst_end_user_ref_id}"
}'
The above example is a simplified version. For production use, you’ll need to provide additional details based on your institution type. Refer to the Institution Required Details documentation for complete requirements. The cip_id of an Identity is required to be unique. If a 409 duplicate cip_id error occurs,
handle it by either:
- Refusing to support crypto brokerage services for institutions that have a duplicate
cip_id
- If they are confirmed to be the same Identity, create a new Account to represent each institution account.
identity_id of the newly created Identity and notice the status of the Identity is PENDING.
Paxos will make an Onboarding Decision and asynchronously update the status to either DENIED or APPROVED.
{
    "id": "{institution_identity_id}",
    "status": "PENDING",
    "created_at": "2021-06-16T09:28:14Z",
    "updated_at": "2021-06-16T09:28:14Z",
    "ref_id": "{your_inst_end_user_ref_id}",
    "institution_details": {
        // ...
    }
}
➌ Wait for the Identity to be Approved
You’ll need to reach out to Support as by default the institution will be stuck in PENDING due to
waiting for document verification, depending on your integration type document verification may not be required - but it
is by default. # Check identity status
curl --location "https://api.sandbox.paxos.com/v2/identity/identities/{institution_identity_id}" \
--header "Authorization: Bearer {access_token}"
➍ Creating an Account and Profile
Now we are ready to make an Account and Profile for the institution Identity. An Account logically relates to an institution’s brokerage account,
an Identity therefore can have one or many Accounts.
# Create account and profile
curl --location "https://api.sandbox.paxos.com/v2/identity/accounts" \
--header "Authorization: Bearer {access_token}" \
--header "Content-Type: application/json" \
--data '{
  "create_profile": true,
  "account": {
    "identity_id": "{institution_identity_id}",
    "name": "Institution Brokerage Account",
    "type": "CRYPTO_BROKERAGE"
  }
}'
# Get the profile ID associated with the account
curl --location "https://api.sandbox.paxos.com/v2/profiles?account_id={account_id}" \
--header "Authorization: Bearer {access_token}"
Booking an Order
We will use the Order API to create buy and sell orders. We recommend also
taking a look at the FIX and WebSocket solutions and using the best combination of APIs
for the specific use case.
➊ Fund the Account
In a complete integration, follow the Fiat Transfers Funding Flow guide to learn how to fund institution assets using
a Fiat Deposit.
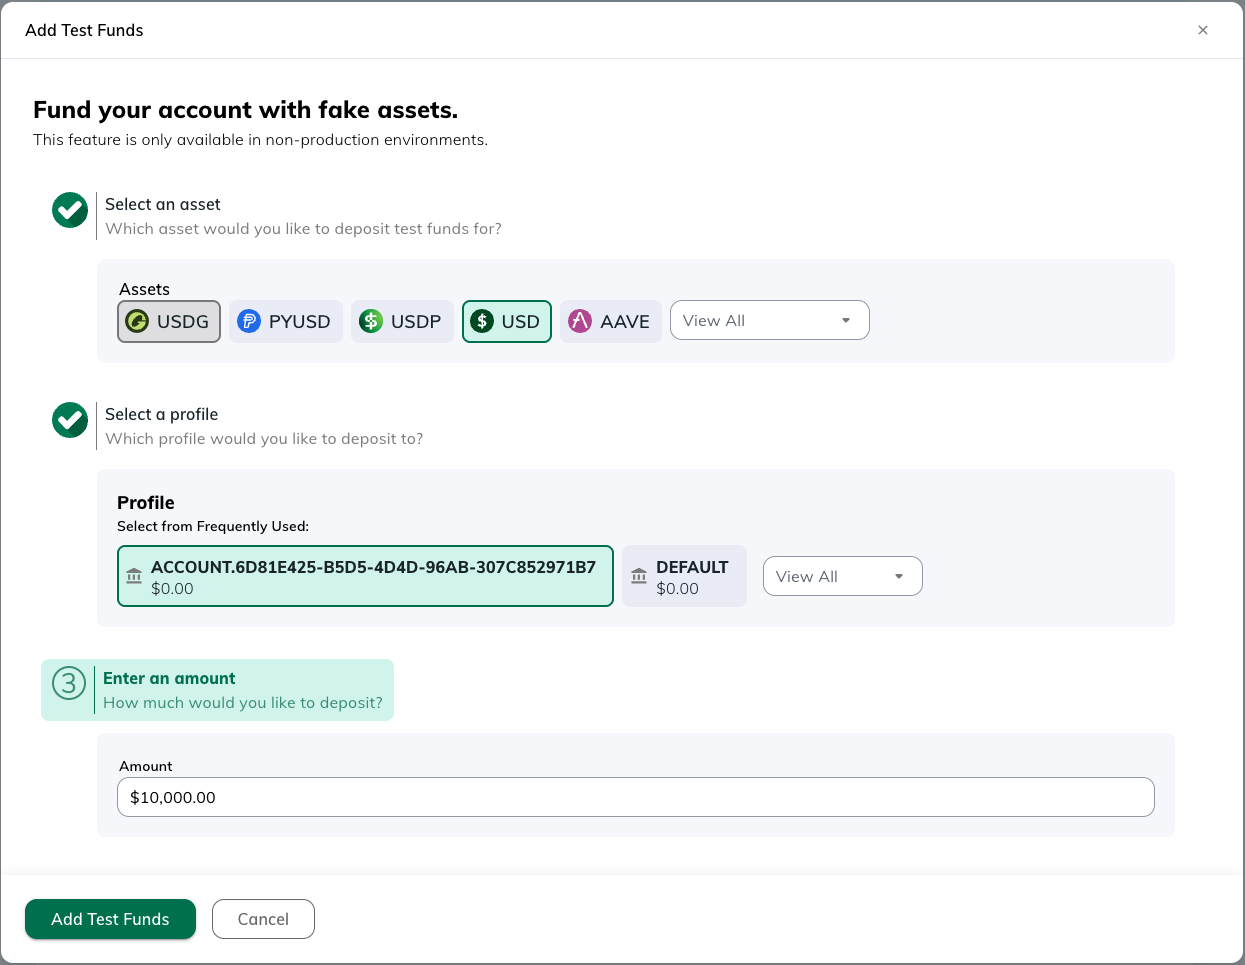
For this guide, we will use the sandbox-only Test Funds feature in Dashboard to fund the Identity with $10,000 USD. First,
navigate to the Dashboard Landing Page and locate the Fund button.
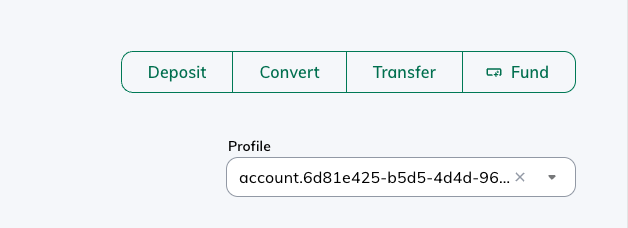 Then select the Profile related to the Account created and fund for $10,000 USD
➋ Creating an Order
To book an order, specify the profile_id which is linked to the account_id created above (if one
exists, else the omnibus profile_id).
Buy
curl --location "https://api.sandbox.paxos.com/v2/profiles/{profile_id}/orders" \
--request "POST" \
--header "Authorization: Bearer {access_token}" \
--data '{
    "side": "BUY",
    "market": "ETHUSD",
    "type": "LIMIT",
    "price": "1814.8",
    "base_amount": "1",
    "identity_id": "{institution_identity_id}",
    "identity_account_id": "{account_id}"
}'
Sell
curl --location "https://api.sandbox.paxos.com/v2/profiles/{profile_id}/orders" \
--request "POST" \
--header "Authorization: Bearer {access_token}" \
--data '{
    "side": "SELL",
    "market": "ETHUSD",
    "type": "LIMIT",
    "price": "1804.2",
    "base_amount": "1",
    "identity_id": "{institution_identity_id}",
    "identity_account_id": "{account_id}"
}'
curl --location "https://api.sandbox.paxos.com/v2/profiles/{profile_id}/orders/{order_id}" \
--request "GET" \
--header "Authorization: Bearer {access_token}"